Subscribing to a Plan
Set up billing and pay for your school's subscription — with real screenshots for every step.
Every new school starts with a 30-day free trial. When you're ready to continue, here's how to set up billing and choose a plan.
 01
01Open Payments and set up billing
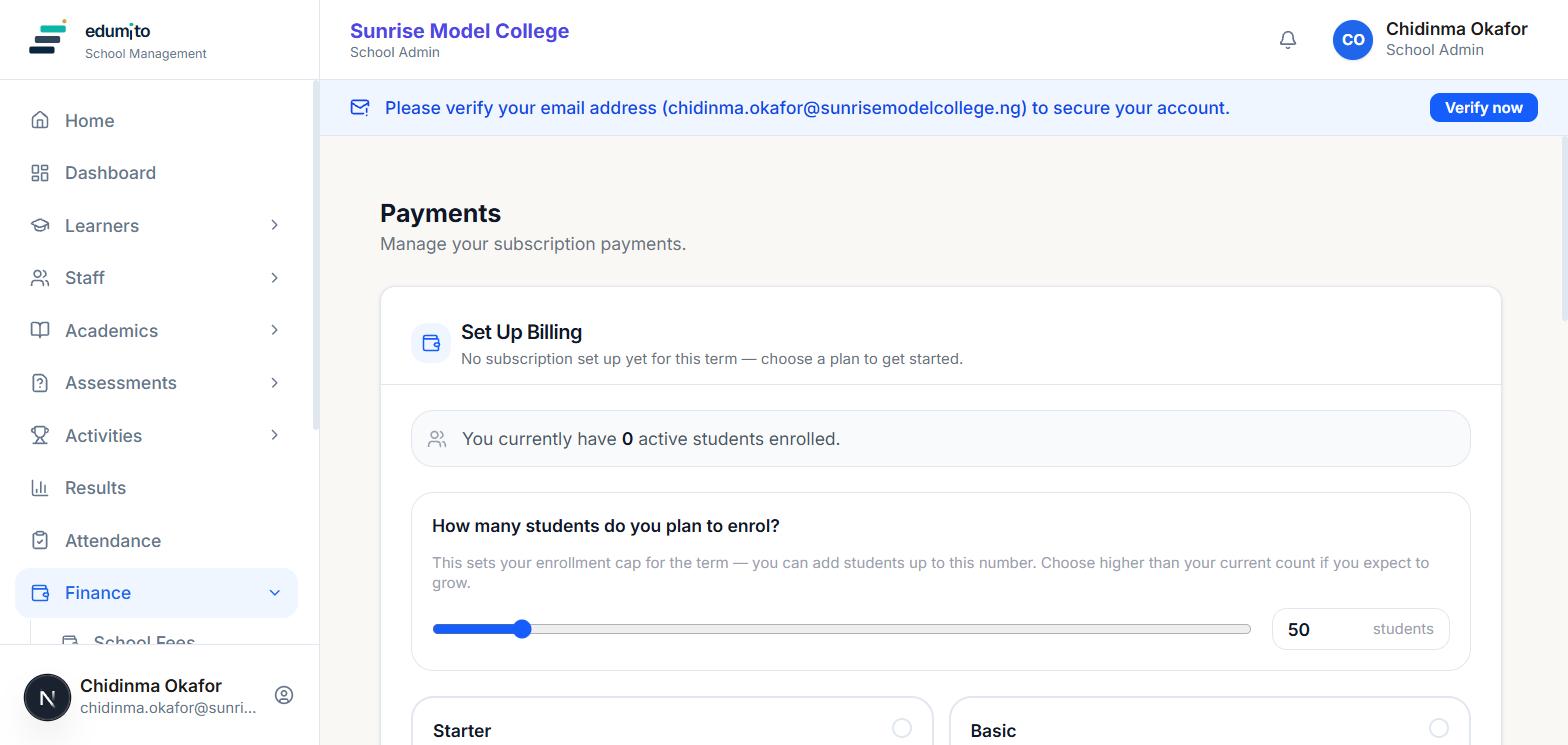
Go to Finance → Subscription. If your term doesn't have a subscription yet, you'll see "Set Up Billing" — this is where you lock in a plan for the current term. First, tell Edumito how many students you plan to enrol; this sets your enrolment cap for the term, so choose a number a little higher than your current count if you expect to grow.
 02
02Choose a plan
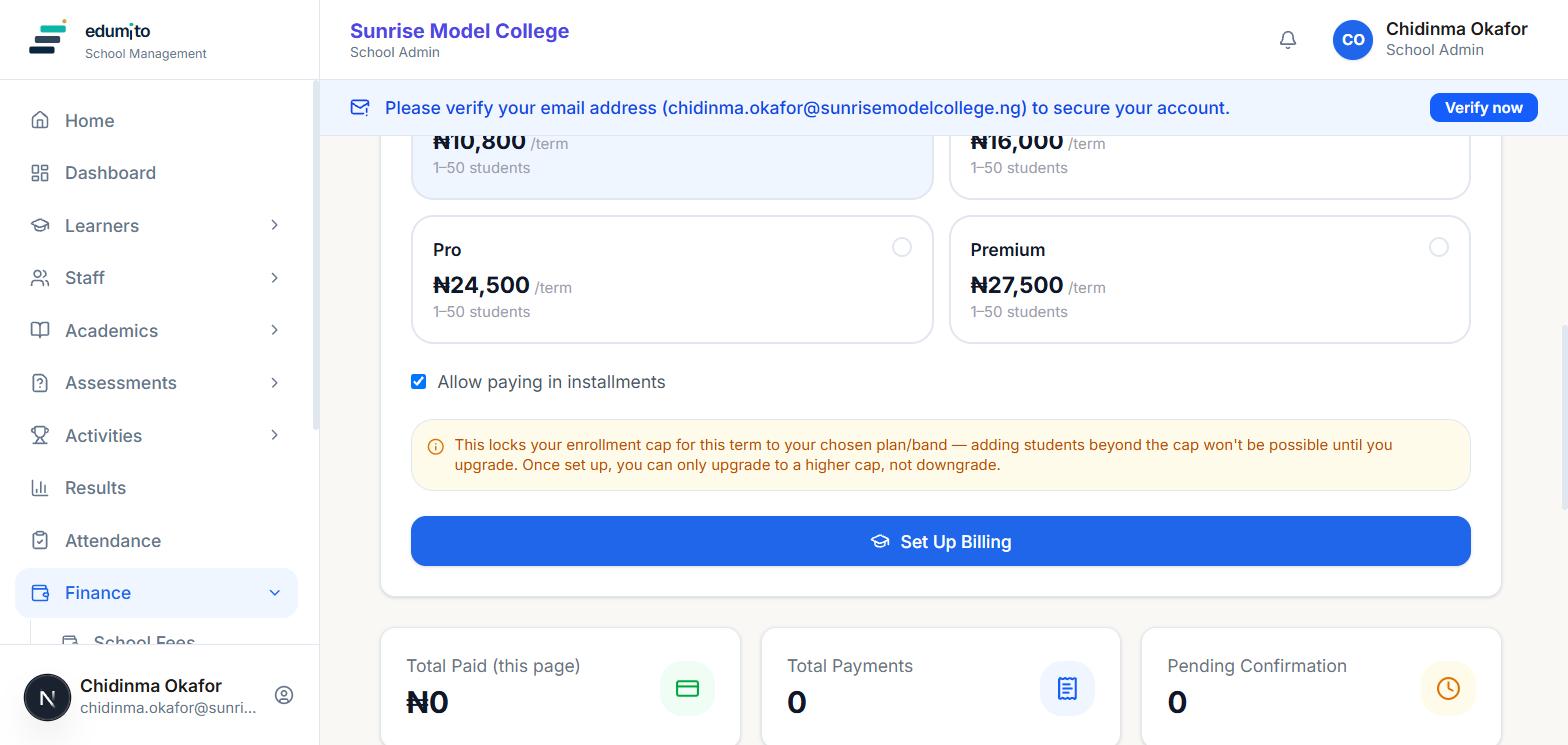
Pick from Starter, Basic, Pro or Premium — prices update automatically based on the student count you entered. You can also choose to allow paying in installments. Once you're happy, click "Set Up Billing" to confirm. Note that this locks your enrolment cap for the term to your chosen plan and band — you can upgrade to a higher cap later, but not downgrade.
 03
03Make a payment
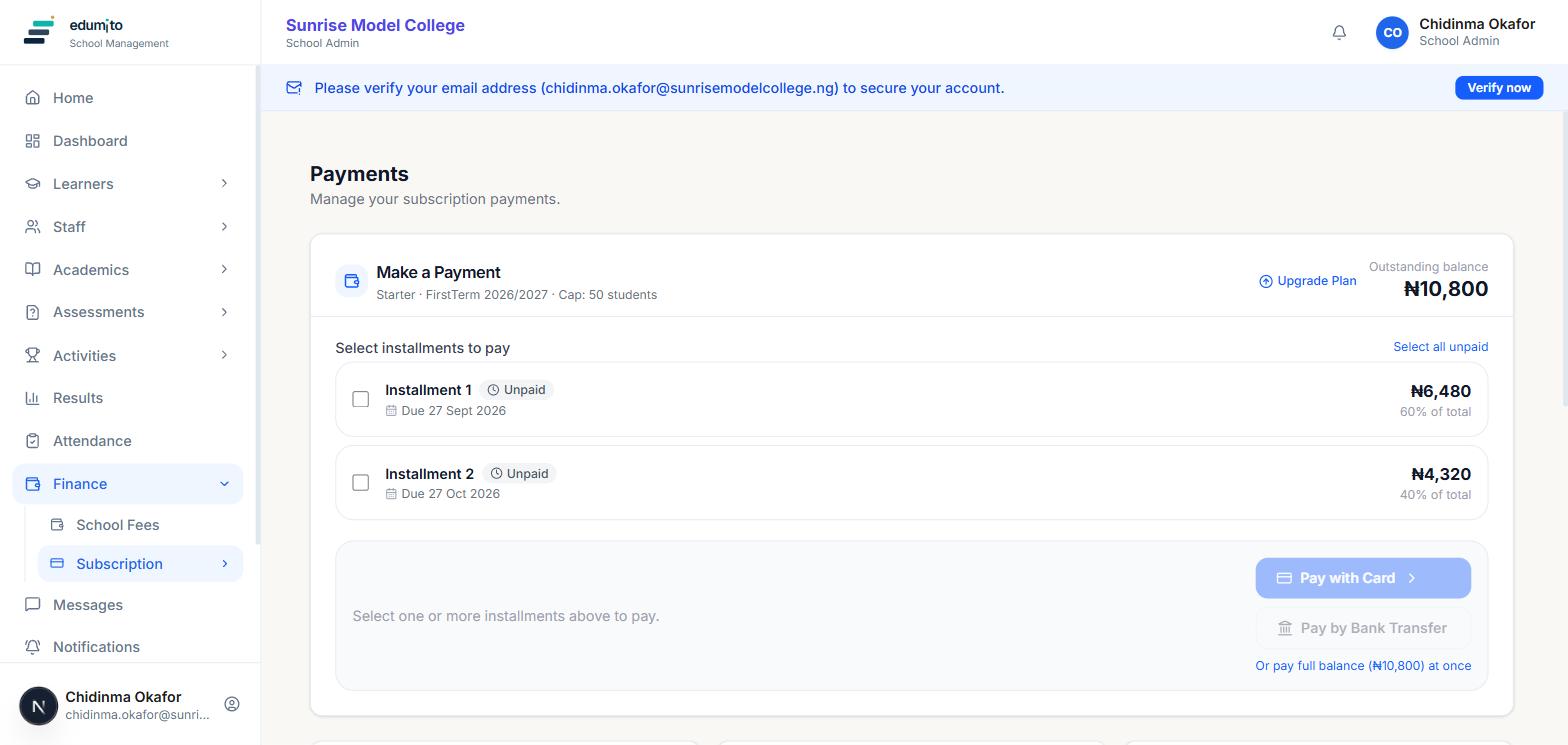
Once billing is set up, the page switches to "Make a Payment" — showing your outstanding balance broken into installments with their due dates. Select which installment(s) you want to pay, then pay with card or by bank transfer, or pay the full balance at once.