Getting Started with Edumito
From your first click to your fully set-up dashboard — with real screenshots for every step.
Signing up takes about two minutes, and the setup wizard that follows walks you through the rest — no IT department required. Here's exactly what to expect.
 01
01Create your school account
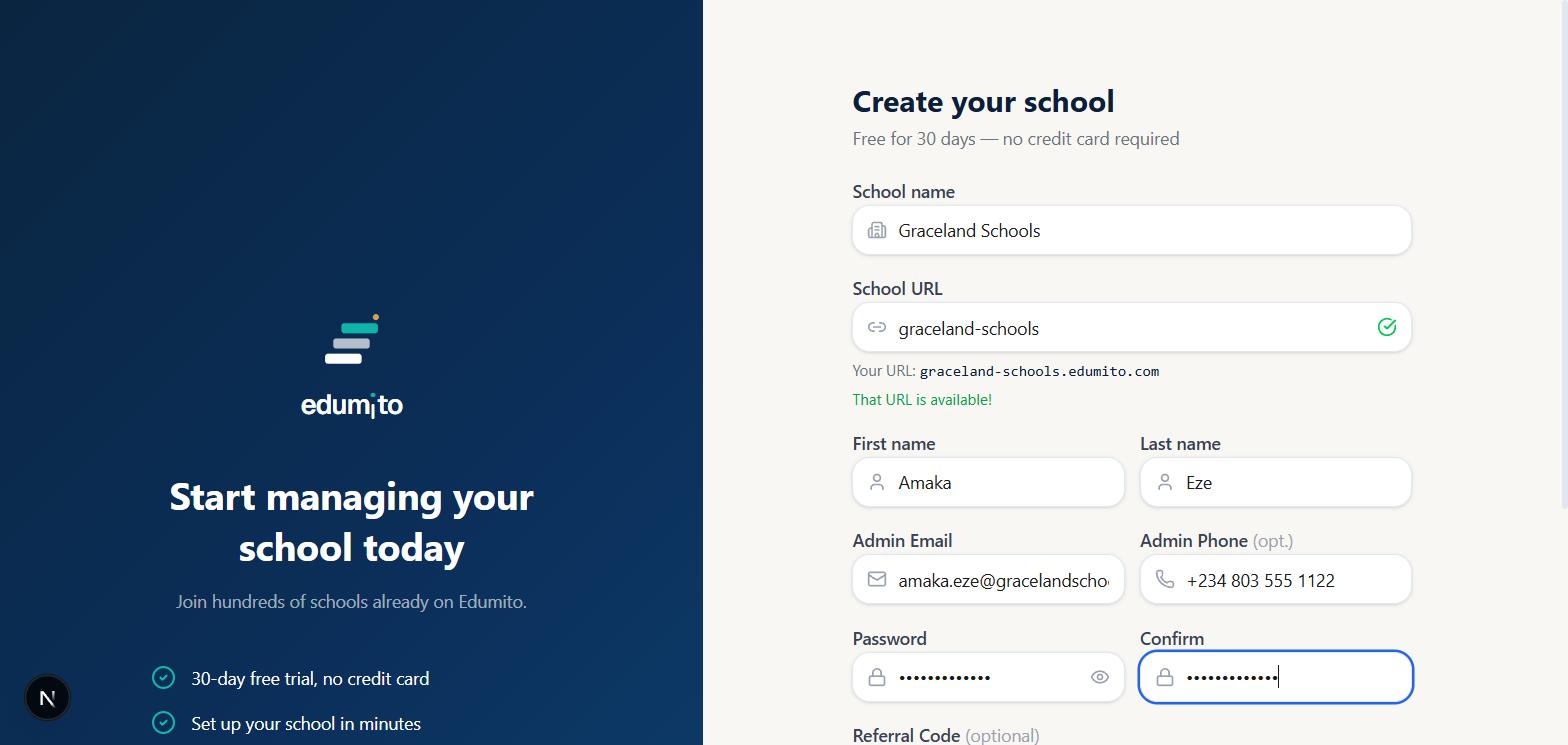
However you got here — a referral link from an existing Edumito school, the “Get started” button on our homepage, or a link shared with you directly — you'll land on the same sign-up form. Enter your school's name and choose a School URL (this becomes your school's own address, e.g. graceland-schools.edumito.com). We check availability as you type. Fill in your name and email as the administrator, set a password, and add a referral code if you have one.
 02
02Confirm your school details
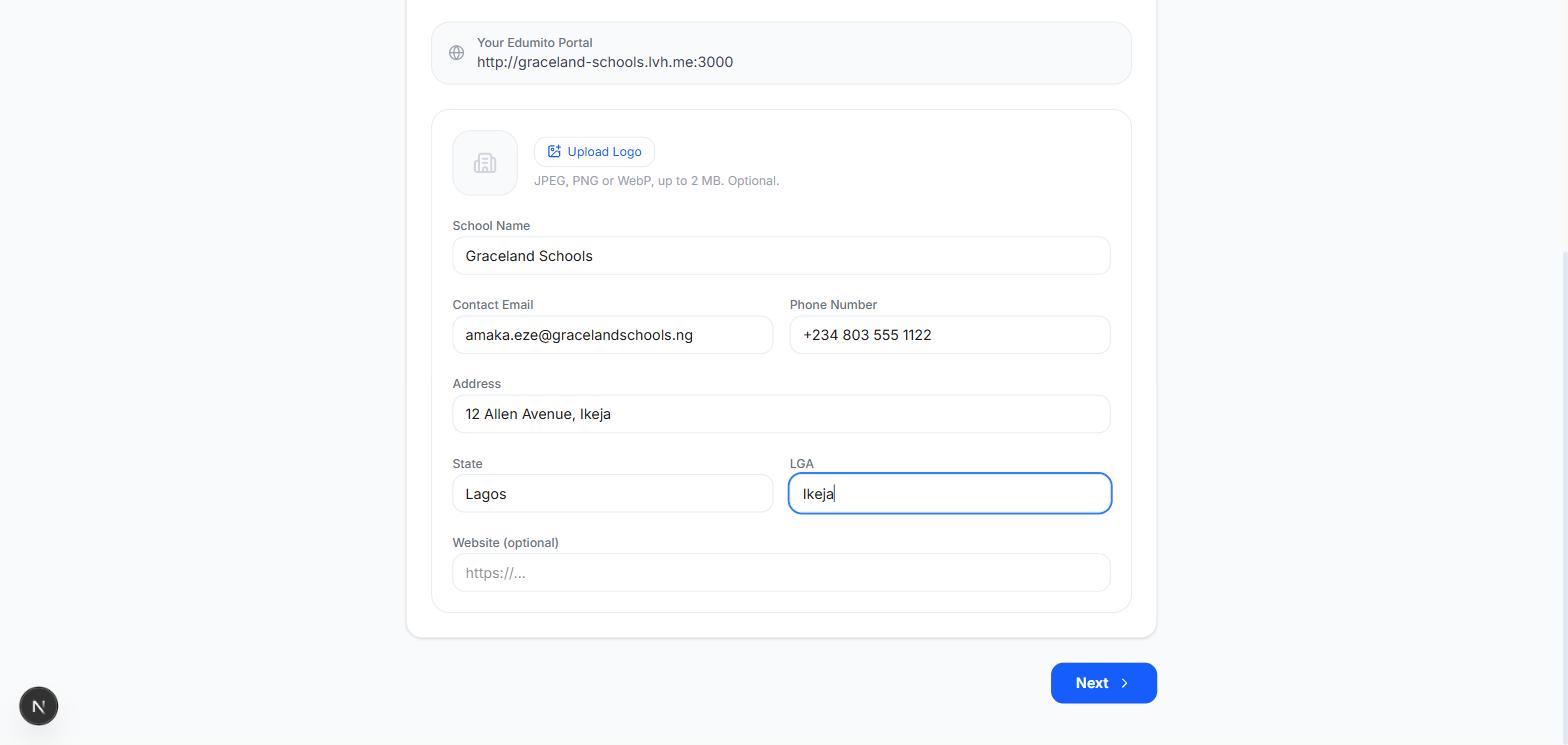
As soon as you create your account, you're taken straight into the Setup Wizard — a seven-step guide to getting your school ready. Step one confirms your school's contact email, address, and lets you upload a logo. Notice your Edumito portal address is already filled in for you — it's the same URL you chose when signing up.
 03
03Set your academic session
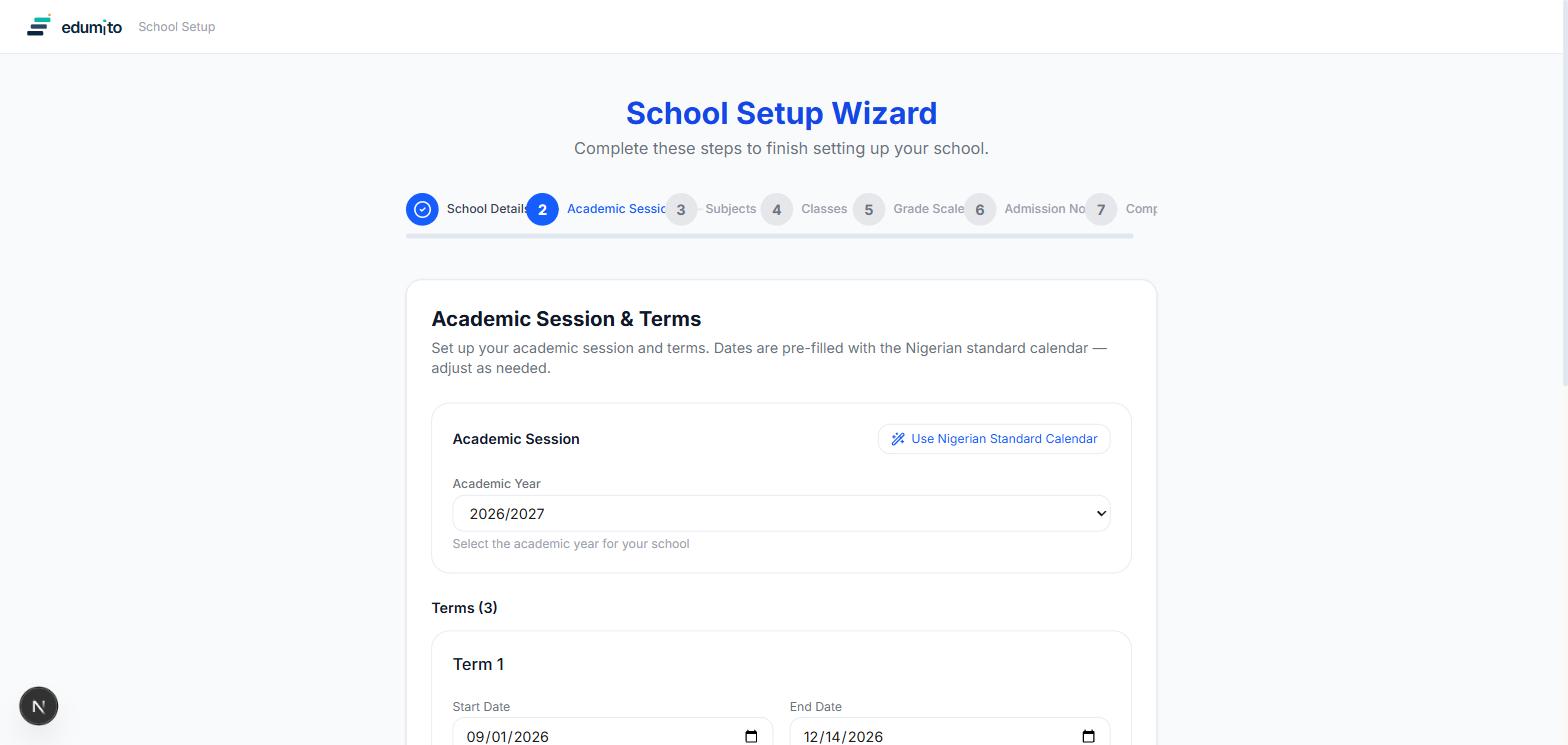
Add your terms for the academic year — Edumito pre-fills the standard Nigerian three-term calendar with sensible start and end dates, so you can accept it as-is or adjust the dates to match your school's own calendar.
 04
04Choose your subjects
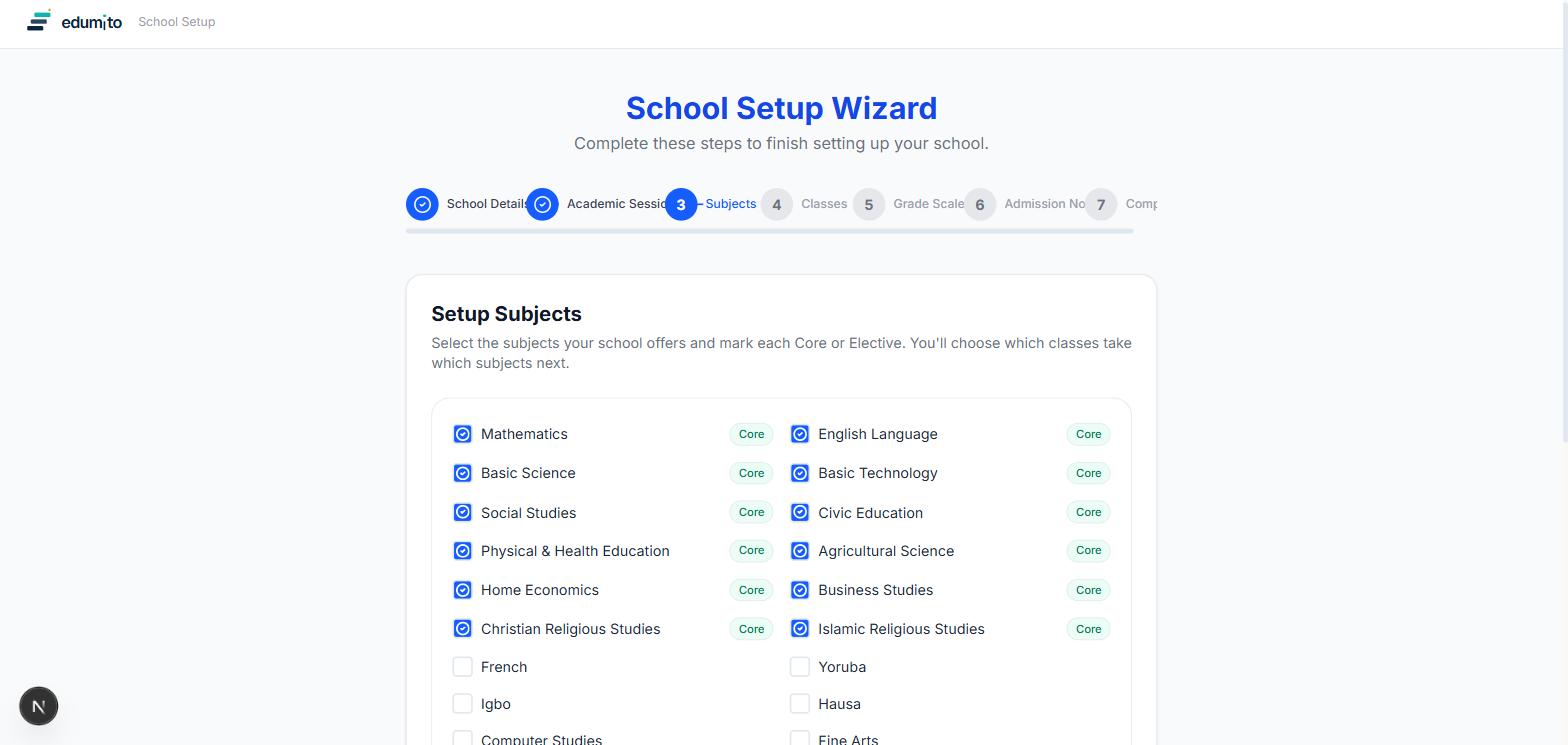
Select the subjects your school offers. Edumito starts you off with the standard Nigerian core subjects already checked, and you can add electives like French, Yoruba, Igbo or Hausa alongside them.
 05
05Set up your classes
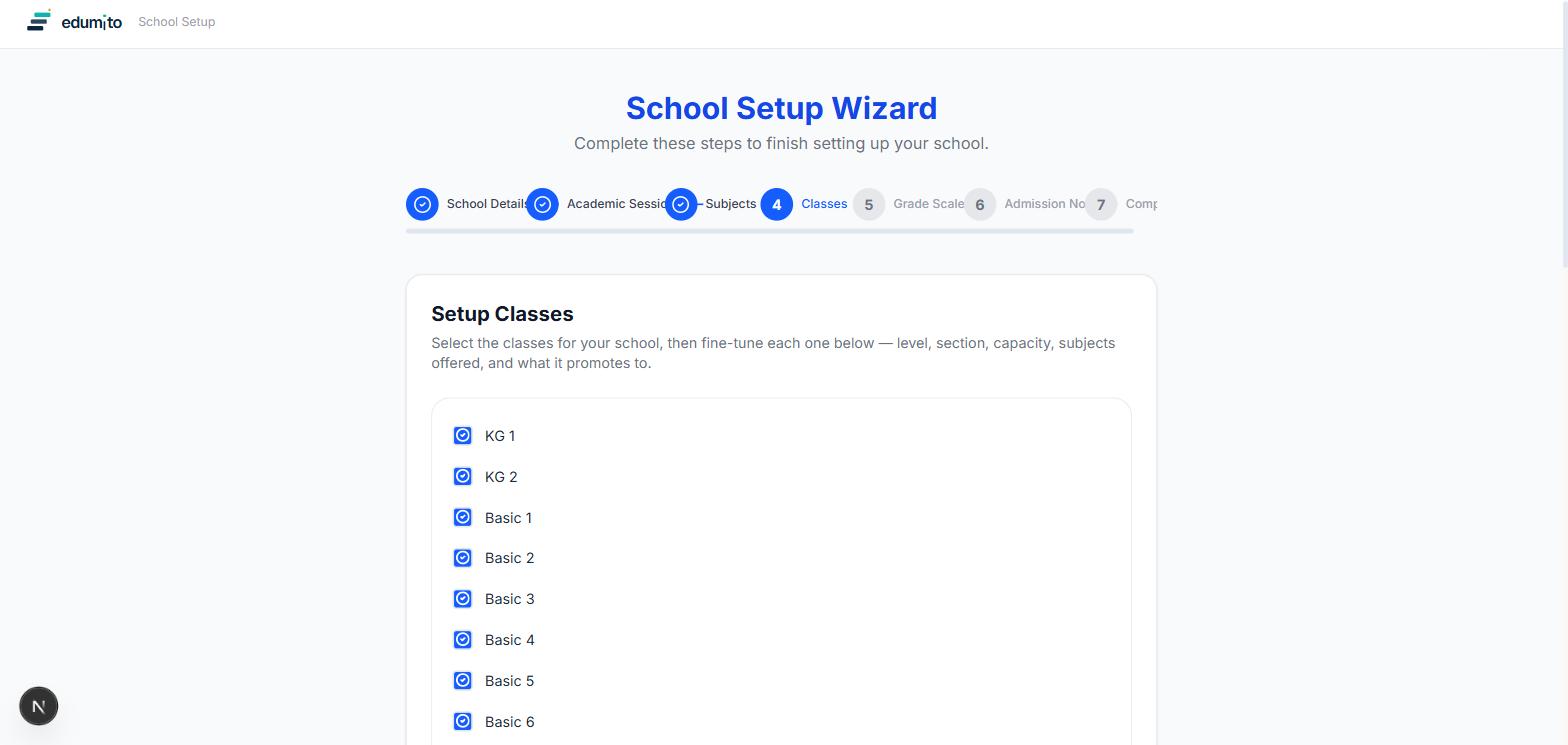
Pick the classes your school runs, from KG 1 through SS 3. You can fine-tune each one afterwards — its section, capacity, which subjects it offers, and which class it promotes into at the end of the year.
 06
06Confirm your grading scale
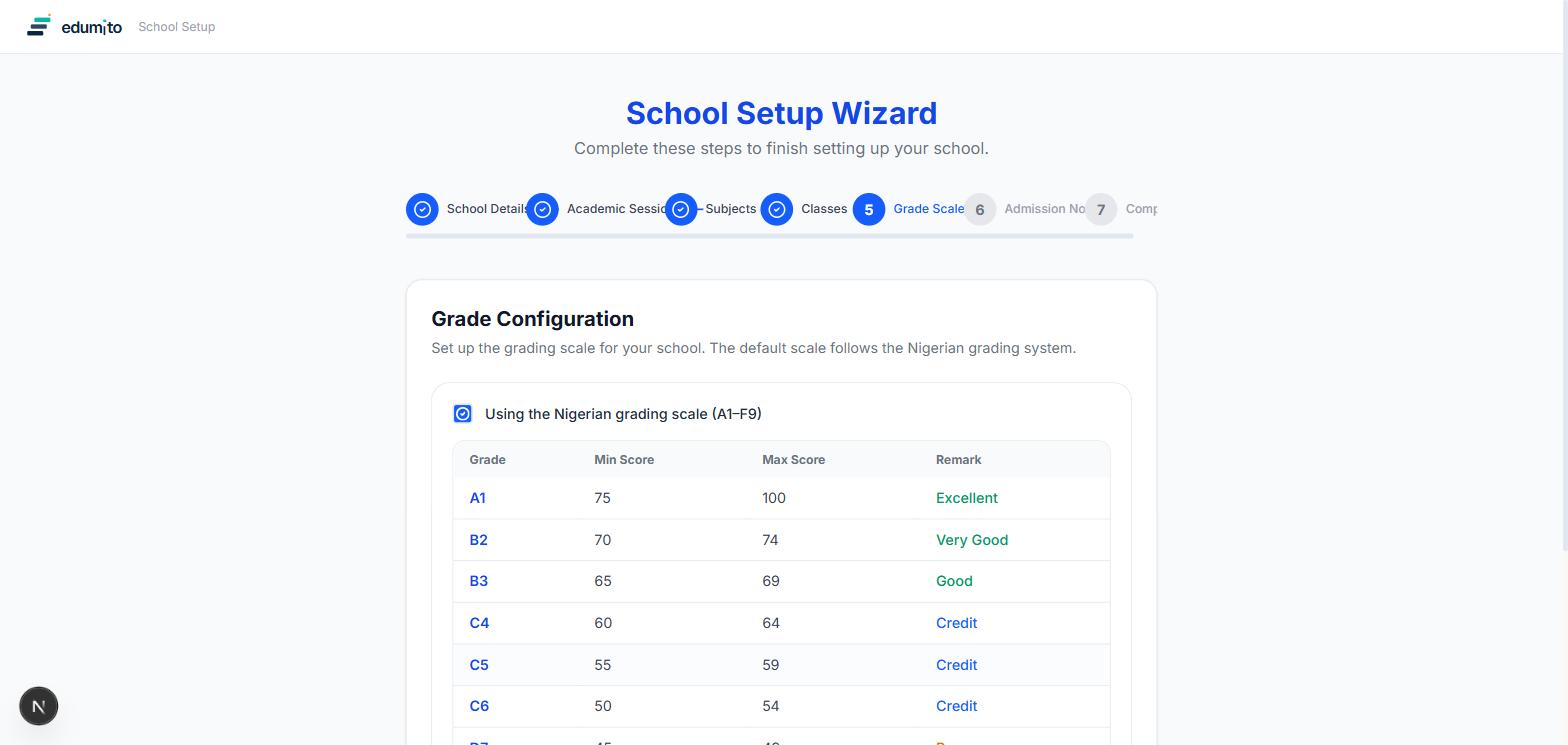
Edumito comes ready with the standard Nigerian grading scale — A1 through F9 — already configured with the correct score ranges and remarks, so there's nothing to set up here unless your school grades differently.
 07
07Pick an admission number format
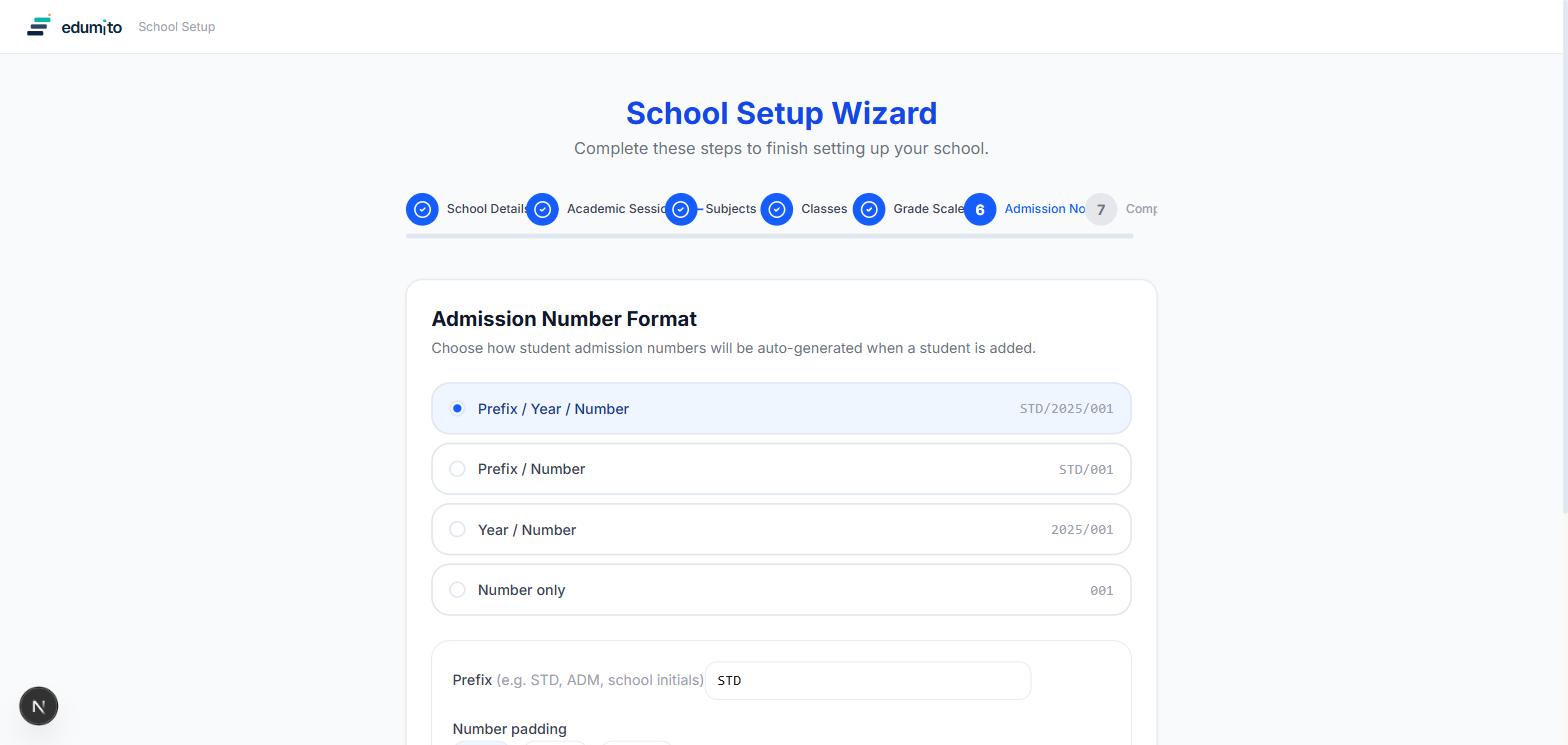
Choose how you'd like students' admission numbers to look — for example Prefix / Year / Number, which produces something like STD/2026/0001. Edumito generates the numbers automatically from this format every time you add a student.
 08
08Review your setup
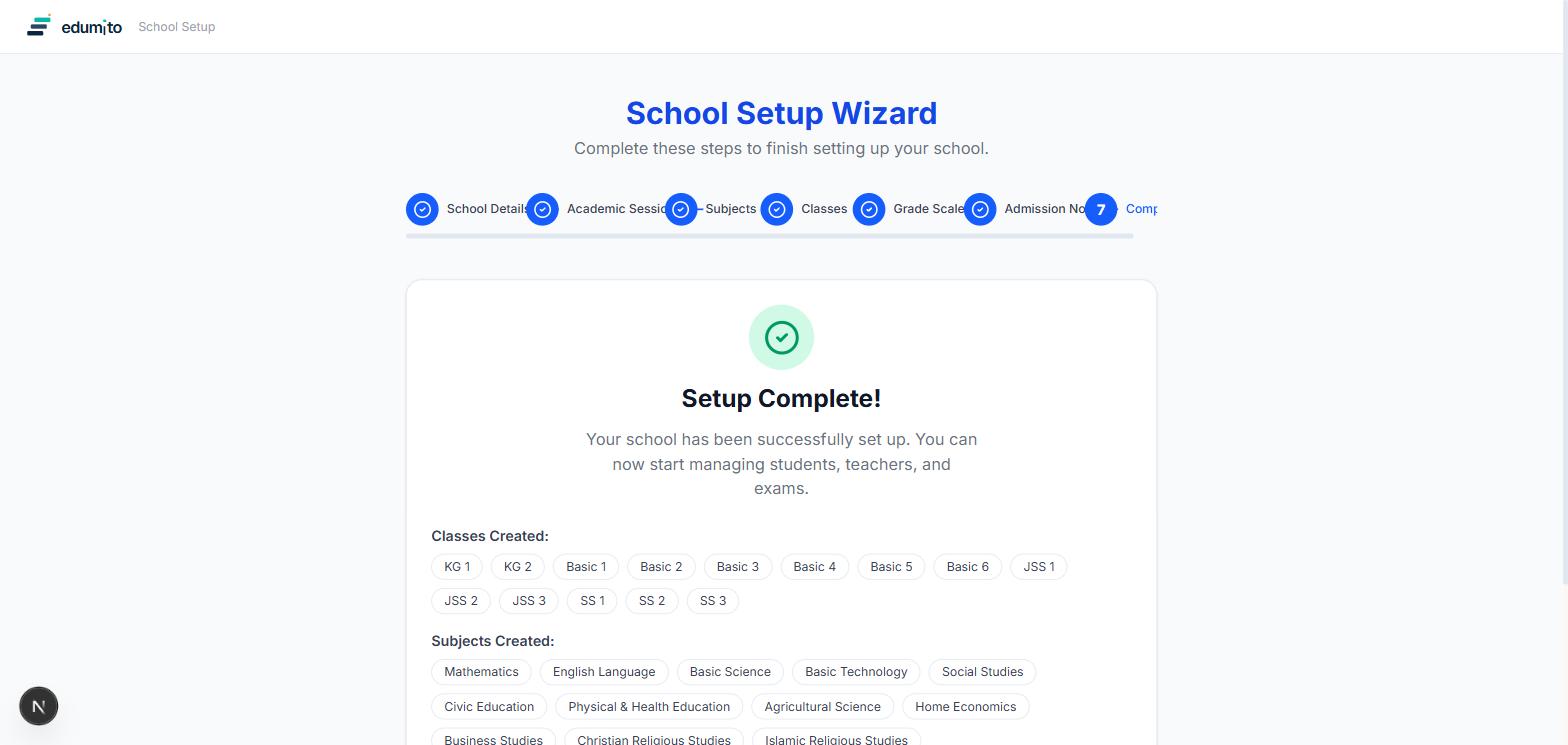
The final wizard step summarises everything you've just created — every class and subject — and confirms your grading scale is in place. From here, click “Choose a Plan” to continue.
 09
09Start your free trial
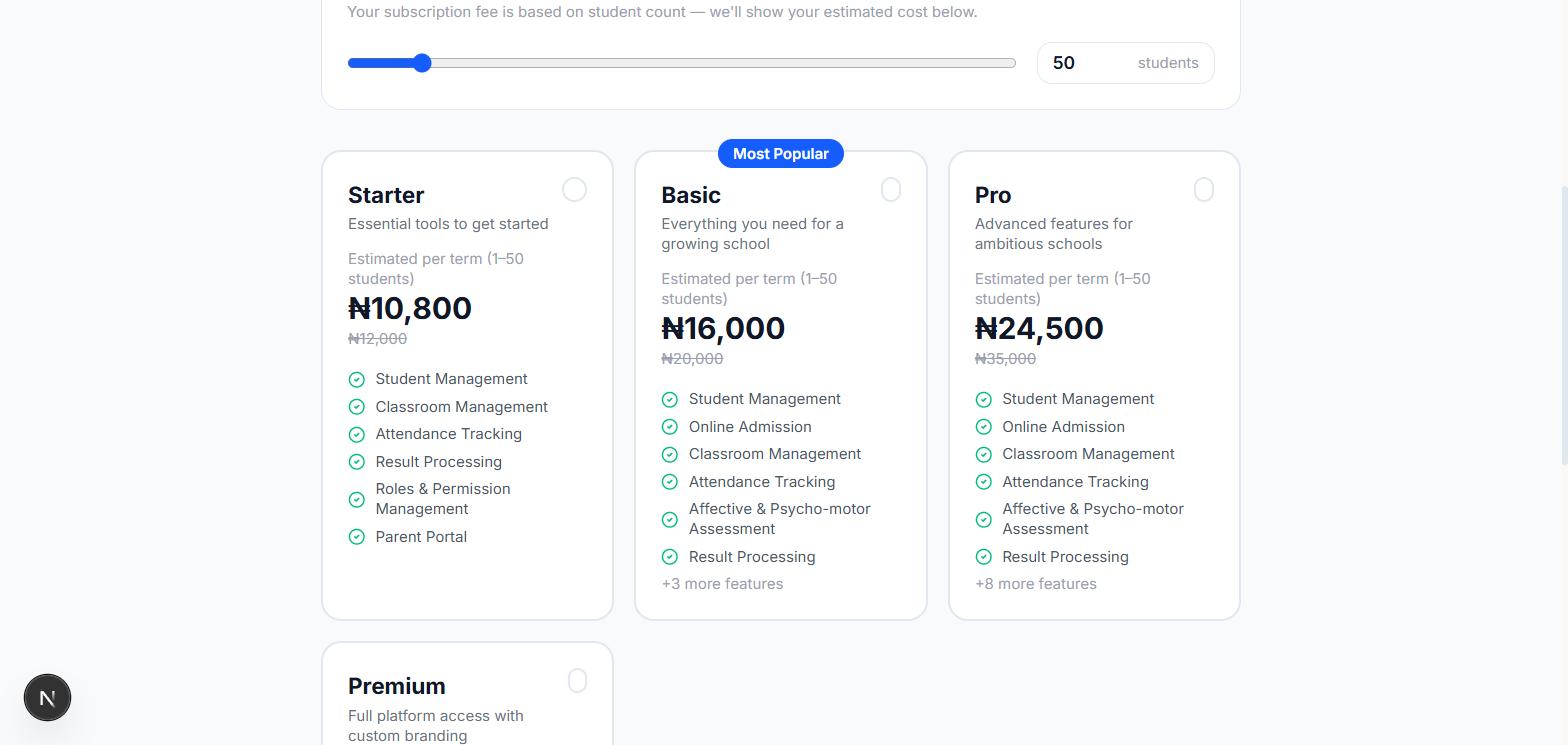
Every new school gets a 30-day free trial — no card required. Pick the plan that fits your school (you can always change this later), enter roughly how many students you expect, and click “Start Free Trial”.
 10
10You're in!
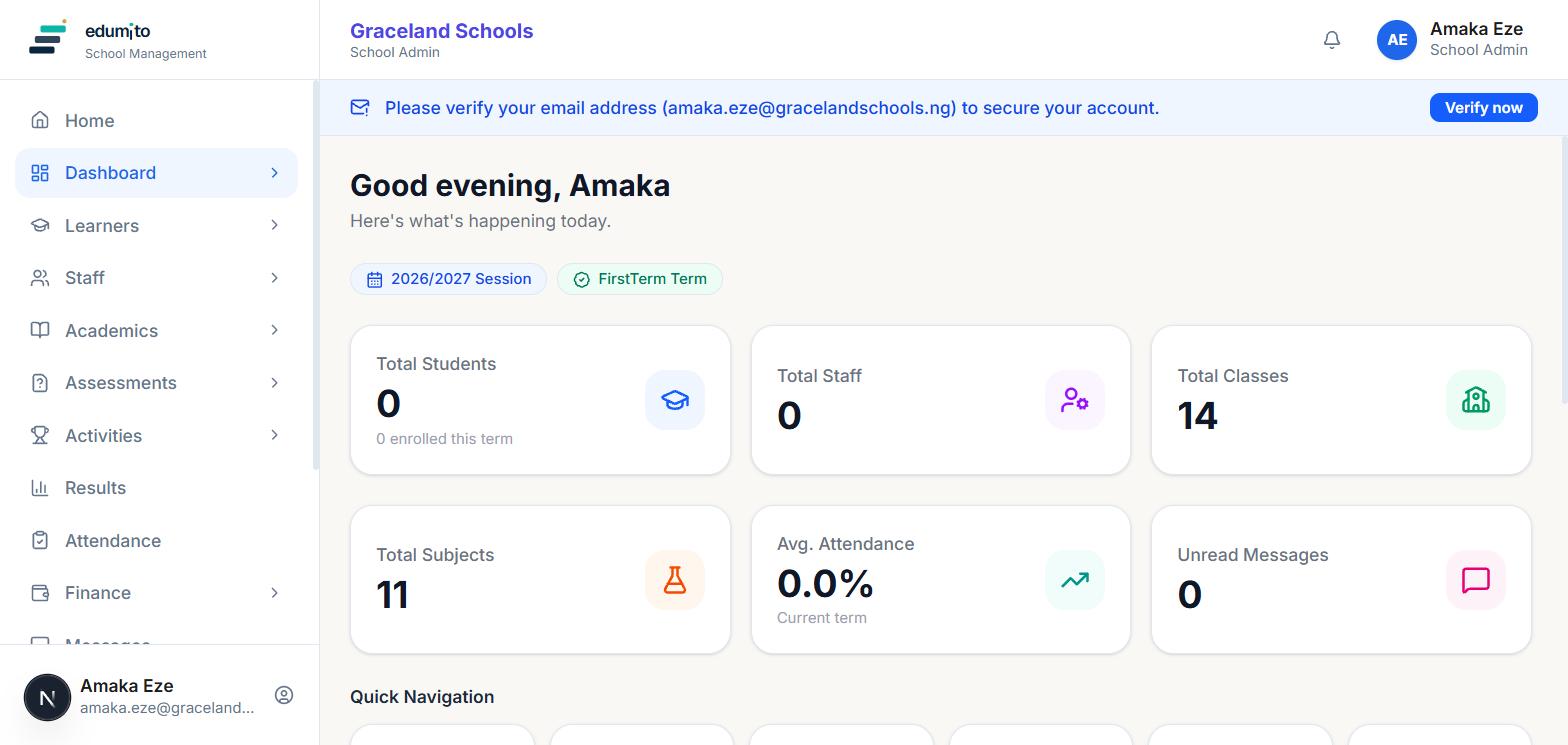
That's it — you land straight on your school's dashboard, fully set up and ready to go. From here you can start adding students, staff, and everything else your school needs day to day.